Install your first Debusine instance
In this tutorial, you will install your first Debusine server and your first Debusine worker. To provide a reproducible experience in a well defined environment, you will install both in the same virtual machine running Debian 13 (trixie).
Note
We will use Incus to manage this virtual machine. Given that incus is an LXD fork, you might be able to easily translate the samples for LXD. If you are more familiar with other virtualization tools (libvirt and virt-manager, virtualbox, etc.), feel free to use those and to adapt the instructions.
Configure the hypervisor to host the Debusine instance (with Incus)
If you have never used Incus, you have to install it and configure it:
$ sudo apt install incus
[...]
Incus has been installed. You must run `sudo incus admin init` to
perform the initial configuration of Incus.
Be sure to add user(s) to either the 'incus-admin' group for full
administrative access or the 'incus' group for restricted access,
then have them logout and back in to properly setup their access.

$ sudo incus admin init --auto
To make the system-wide incus daemon fully controllable by your user, run this command:
$ sudo adduser $USER incus-admin
info: Adding user `sample-user' to group `incus-admin' ...
$ newgrp incus-admin
Note
The newgrp incus-admin command starts a new shell where you immediately have the newly granted group. Otherwise you have to close your session and start a new one to get the new privilege.
Install the Debusine virtual machine
With incus, there’s no installation involved, as we can simply rely on the pre-built images provided by the linux containers project. So you can instantiate and start a new virtual machine with this single command:
$ incus launch images:debian/trixie/cloud debusine --vm \
    -c limits.memory=2GiB --device root,size=50GiB
Launching debusine
From there, you can execute any command within the virtual machine
with incus exec debusine -- $COMMAND (replacing $COMMAND with
the command of your choice). You can also easily start a shell inside the
virtual machine:
$ incus shell debusine
root@debusine:~# cat /etc/debian_version
13.0
Warning
Note that you can only execute a command once the virtual machine has finished to boot (it can take up to a few tens of seconds). In the mean time, the above command might return an error (Error: VM agent isn’t currently running).
All the commands in this tutorial that start with the root@debusine
prompt are to be executed in such a shell inside the virtual machine.
In order to work properly, the Debusine server needs to have a fully
qualified domain name and unfortunately Incus doesn’t set one for us.
Let’s fix this by granting the debusine.internal name on top of the
plain unqualified hostname (debusine):
root@debusine:~# sed -i -e "s/$HOSTNAME/debusine.internal &/" /etc/hosts
root@debusine:~# hostname -f
debusine.internal
Install the packages
First you want to configure APT with the trixie-backports repository:
root@debusine:~# cat >/etc/apt/sources.list.d/trixie-backports.list <<END
deb http://deb.debian.org/debian trixie-backports main
END
root@debusine:~# apt update
[…]
Then you install a bunch of packages:
the postgresql database server (install it first so that automatic database configuration works when you install the debusine packages)
the redis database server
the nginx webserver
the three packages for the Debusine server, the worker, and the signing worker
some Debian tools that are required for the worker to be able to perform some useful tasks
This will prompt for database configuration for debusine-signing and
debusine-server; you can press Enter at each prompt to accept the
defaults.
root@debusine:~# apt install postgresql redis nginx
[…]
root@debusine:~# apt install --no-install-recommends \
 devscripts
[…]
root@debusine:~# apt install debusine-server/trixie-backports \
 debusine-worker/trixie-backports debusine-signing/trixie-backports
[…]
root@debusine:~# apt install piuparts blhc
[…]
Note
If you are also running docker on the same computer, you might discover at this point that the network is not functional inside the virtual machine. This is usually due to docker configuring restrictions in the local firewall when the service has to enable IPv4 forwarding. See the incus documentation for possible solutions.
Configure the webserver
You will now configure the webserver:
root@debusine:~# rm -f /etc/nginx/sites-enabled/default
root@debusine:~# cp /usr/share/doc/debusine-server/examples/nginx-vhost.conf \
  /etc/nginx/sites-enabled/debusine
root@debusine:~# systemctl restart nginx
Test the access to the web interface
Now it’s time to ensure that you can open Debusine’s web interface.
The default configuration of the Debusine server assumes that you will
access it through the fully qualified name obtained with hostname -f
in the virtual machine.
On your machine, you can look up the IPv4 address assigned to your virtual
machine, associate it with the same hostname by creating an entry in
/etc/hosts, and open your web browser on the corresponding URL:
$ DEBUSINE_HOSTNAME=$(incus exec debusine -- hostname -f)
$ IPV4=$(incus list debusine -c 4 -f csv | awk '{print $1}')
$ echo "$IPV4 $DEBUSINE_HOSTNAME deb.$DEBUSINE_HOSTNAME" | sudo tee -a /etc/hosts
10.178.127.31 debusine.internal deb.debusine.internal
$ xdg-open http://$DEBUSINE_HOSTNAME/
If you want to be able to connect to Debusine over HTTPS (optional), extract the virtual machine’s self-signed certificate and add it to your machine’s certificate collection. You can then open your web browser on the corresponding HTTPS URL, although you’ll have to accept a security warning about the self-signed certificate:
$ incus exec debusine -- cat /etc/ssl/certs/ssl-cert-snakeoil.pem | \
    sudo tee "/usr/local/share/ca-certificates/$DEBUSINE_HOSTNAME.crt" >/dev/null
$ sudo update-ca-certificates
$ xdg-open https://$DEBUSINE_HOSTNAME/
The Debusine server is running:
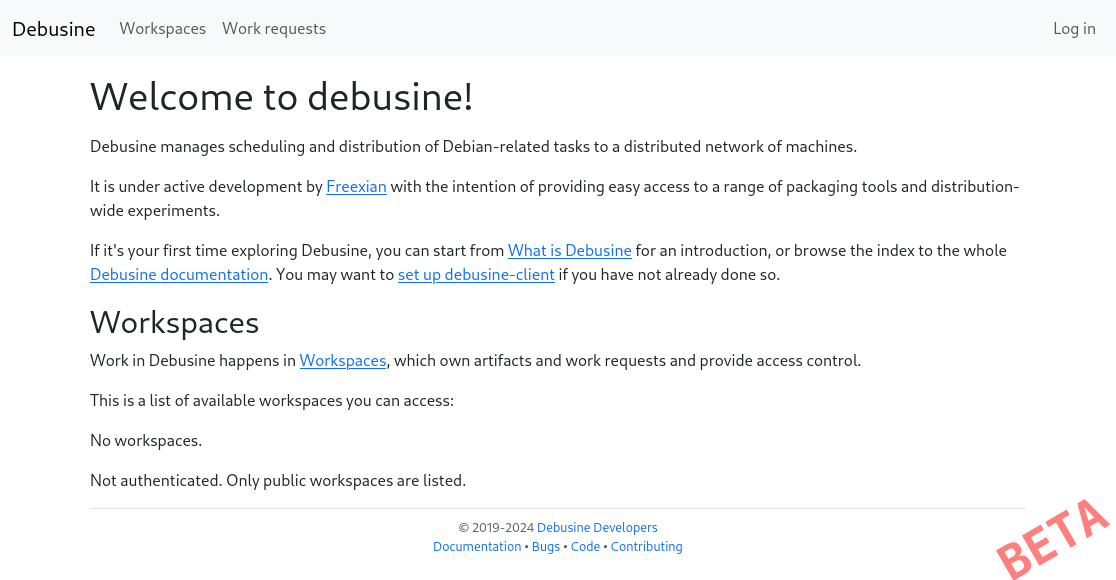
You notice a login button, but you don’t know what credentials to enter.
Let’s fix this. Go back in the server virtual machine and use the
debusine-admin create_user USERNAME EMAIL command to create yourself
a user in the system:
root@debusine:~# debusine-admin create_user myuser user@example.org
I4X'JISFj7GhOvN1
The password that has been assigned to the newly created user is displayed on standard output. Go back to the web browser, and try it out!
Configure the worker
While the server part is now ready, the worker isn’t yet. First step is to configure the worker so that it connects to the server and make itself available:
root@debusine:~# cp /usr/share/doc/debusine-worker/examples/config.ini \
     /etc/debusine/worker/
root@debusine:~# sed -i -e "s/localhost/debusine.internal/" \
     /etc/debusine/worker/config.ini
root@debusine:~# systemctl restart debusine-worker
Note
The sample configuration file uses http://localhost/api as
the server URL and we change it to http://debusine.internal/api for
consistency.
Finally, you approve the worker on the server side:
root@debusine:~# debusine-admin worker list
                    ╷          ╷                      ╷                      ╷                      ╷
                    │          │                      │                      │ Token hash (do not   │
  Name              │ Type     │ Registered           │ Connected            │ copy)                │ Enabled
 ═══════════════════╪══════════╪══════════════════════╪══════════════════════╪══════════════════════╪═════════
  celery            │ celery   │ 2025-08-15T09:48:06… │ 2025-08-15T09:48:07… │ -                    │ -
  debusine-internal │ external │ 2025-08-15T10:11:58… │ -                    │ fd31ea45e97ed7dacd3… │ False
                    ╵          ╵                      ╵                      ╵                      ╵
root@debusine:~# debusine-admin worker enable debusine-internal
The recommended worker backend for Debusine is Incus. To use this, install Incus on your Debusine worker. For more details, see Set up Incus on a Debusine worker:
root@debusine:~# apt install incus
root@debusine:~# /usr/share/doc/debusine-worker/examples/configure-worker-incus.sh
The worker is now ready to process work requests.
Configure the signing worker
There is a separate signing worker that needs to be configured in a similar way to the ordinary (external) worker:
root@debusine:~# cp /usr/share/doc/debusine-signing/examples/config.ini \
     /etc/debusine/signing/
root@debusine:~# sed -i -e "s/localhost/debusine.internal/" \
     /etc/debusine/signing/config.ini
root@debusine:~# debusine-signing generate_service_key /etc/debusine/signing/0.key
root@debusine:~# systemctl restart debusine-signing
For the signing worker to be able to fetch artifacts from the server, it needs to trust the server’s HTTPS certificate:
root@debusine:~# cp /etc/ssl/certs/ssl-cert-snakeoil.pem \
     "/usr/local/share/ca-certificates/$(hostname -f).crt"
root@debusine:~# update-ca-certificates
Approve the signing worker on the server side:
root@debusine:~# debusine-admin worker list
                      ╷          ╷                     ╷                      ╷                     ╷
                      │          │                     │                      │ Token hash (do not  │
  Name                │ Type     │ Registered          │ Connected            │ copy)               │ Enabled
 ═════════════════════╪══════════╪═════════════════════╪══════════════════════╪═════════════════════╪═════════
  celery              │ celery   │ 2025-08-15T09:48:0… │ 2025-08-15T09:48:07… │ -                   │ -
  debusine-internal   │ external │ 2025-08-15T10:11:5… │ 2025-08-15T10:17:23… │ fd31ea45e97ed7dacd… │ True
  debusine-internal-2 │ signing  │ 2025-08-15T10:19:1… │ -                    │ 44202a269f40715cb7… │ False
                      ╵          ╵                     ╵                      ╵                     ╵
root@debusine:~# debusine-admin worker enable --worker-type signing debusine-internal-2
Next steps
You can start to experiment with Debusine’s features. For this, you can follow the tutorial Getting started with Debusine.